Reverse Proxy for HTTPS with IIS
TIP
Make sure you FULLY understand the Network Architecture before continue.
Generate SSL Certificate
The following websites provide free 90-days SSL certificate for your domain. You can also choose other providers.
You can also choose to get a certificate from Let's Encrypt, Other CA, or Self-Signed Certificate. Note, that a self-signed certificate is not trusted by OS and browser by default, it has to be added to the certificate store manually.
#Generate a Self-Signed Certificate using OpenSSL
openssl req -x509 -newkey rsa:4096 -keyout key.pem -out cert.pem -sha256 -days 365
Convert SSL Certificate/Prepare the Certificate Chain
Prepare the following files:
- Issued certificate, e.g. domain.crt。
- Certificate of CA, can be downloaded from their website. e.g. ca.crt.
- Private key of issued certificate, e.g. domain.key。
We will use domain.crt, ca.crt, domain.key as examples in this tutorial.
Windows system certificate store cannot directly import PEM format files, so you need to convert them to PFX format:
openssl pkcs12 -export -out certificate.pfx -inkey domain.key -in domain.crtIntegrating the certificate chain is generally not necessary because the required certificate chain is usually already trusted by the trust list. If you need to integrate the certificate chain for some reason, use the following command:
openssl pkcs12 -export -out certificate.pfx -inkey domain.key -in domain.crt -certfile ca.crtInstall IIS
Windows Server
- Open
Server Managerand clickManage>Add Role and Features - Navigate to
Server Rolesand checkWeb Server (IIS)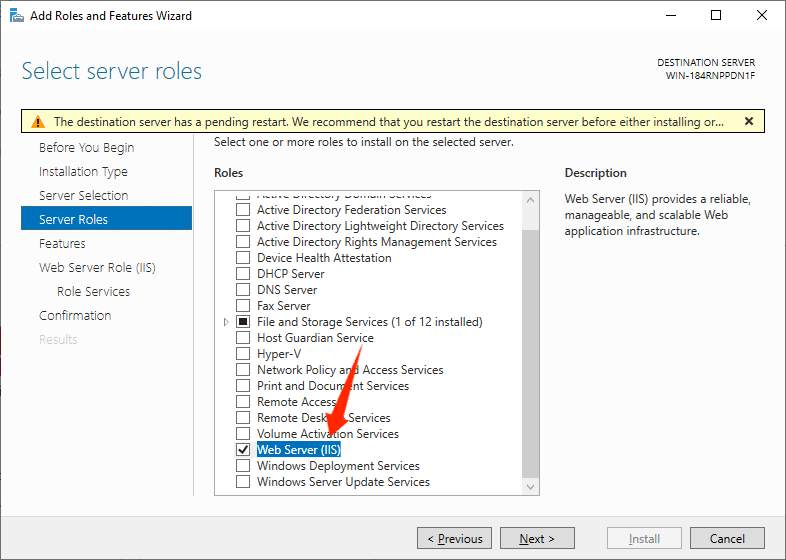
- Go to
Web Server Role (IIS)/Role Services - Add the following features
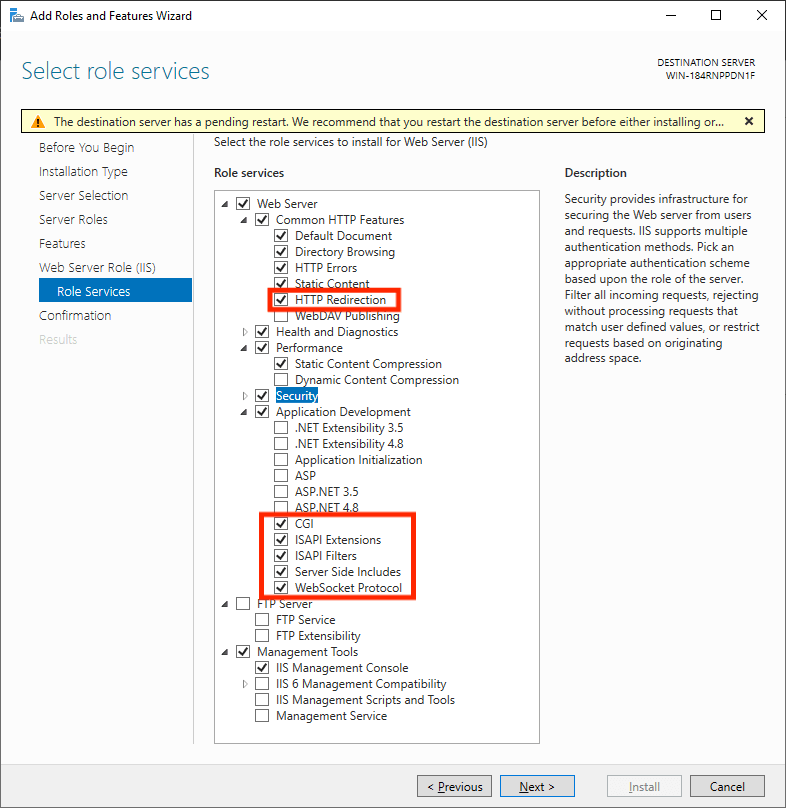
- Common HTTP Features
- HTTP Redirection
- Application Development
- CGI
- ISAPI Extensions
- ISAPI Filters
- Server Side Includes
- WebSocket Protocol
- Common HTTP Features
- Go to
ConfirmationandInstall
Windows for Consumers
Press Win+R, type in optionalfeatures and press Enter.
Refer to the above Windows Server tutorial to add Internet Information Services and corresponding additional features in World Wide Web Services.
Install prerequisite plugins
Application Request Routing
URL Rewrite
- English: 32-bit / 64-bit
- German: 32-bit / 64-bit
- Spanish: 32-bit / 64-bit
- French: 32-bit / 64-bit
- Italian: 32-bit / 64-bit
- Japanese: 32-bit / 64-bit
- Korean: 32-bit / 64-bit
- Russian: 32-bit / 64-bit
- Chinese Simplified: 32-bit / 64-bit
- Chinese Traditional: 32-bit / 64-bit
After installation, restart IIS service or reboot the computer.
Install Certificate
- Navigate to IIS local machine configuration and enter
Server Certificates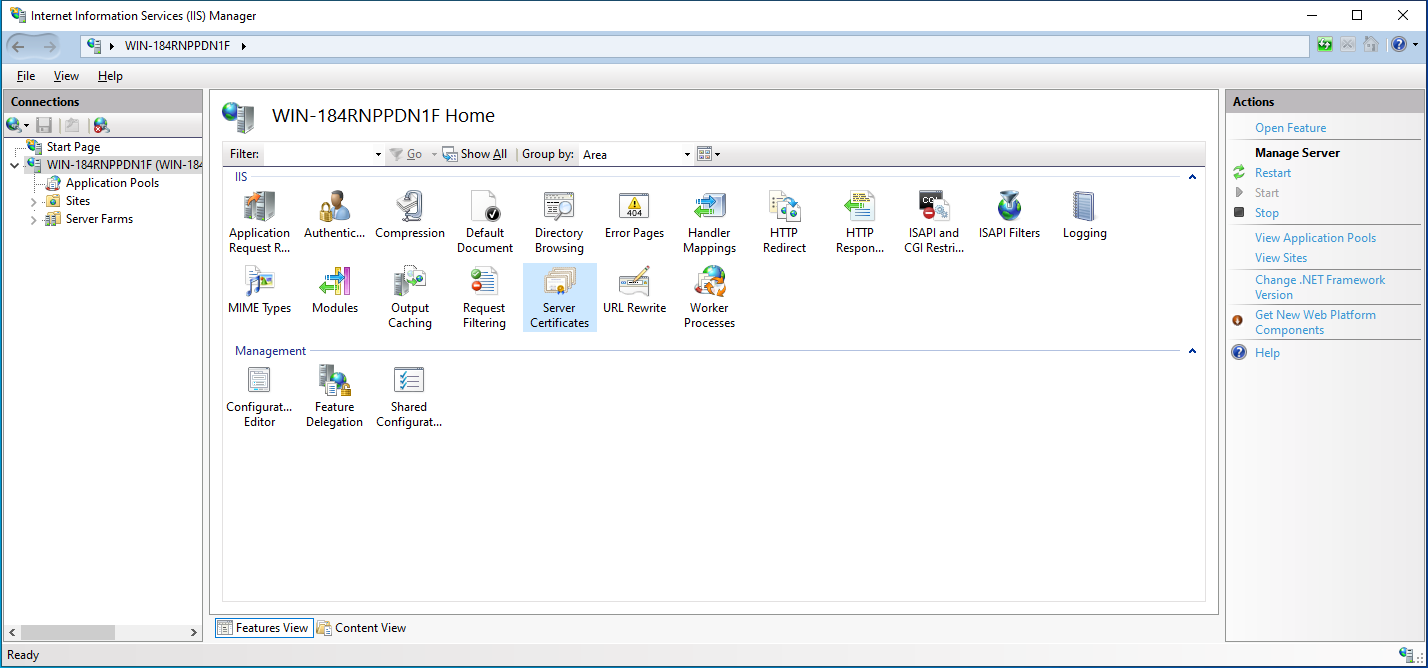
- Click
Importon the right panel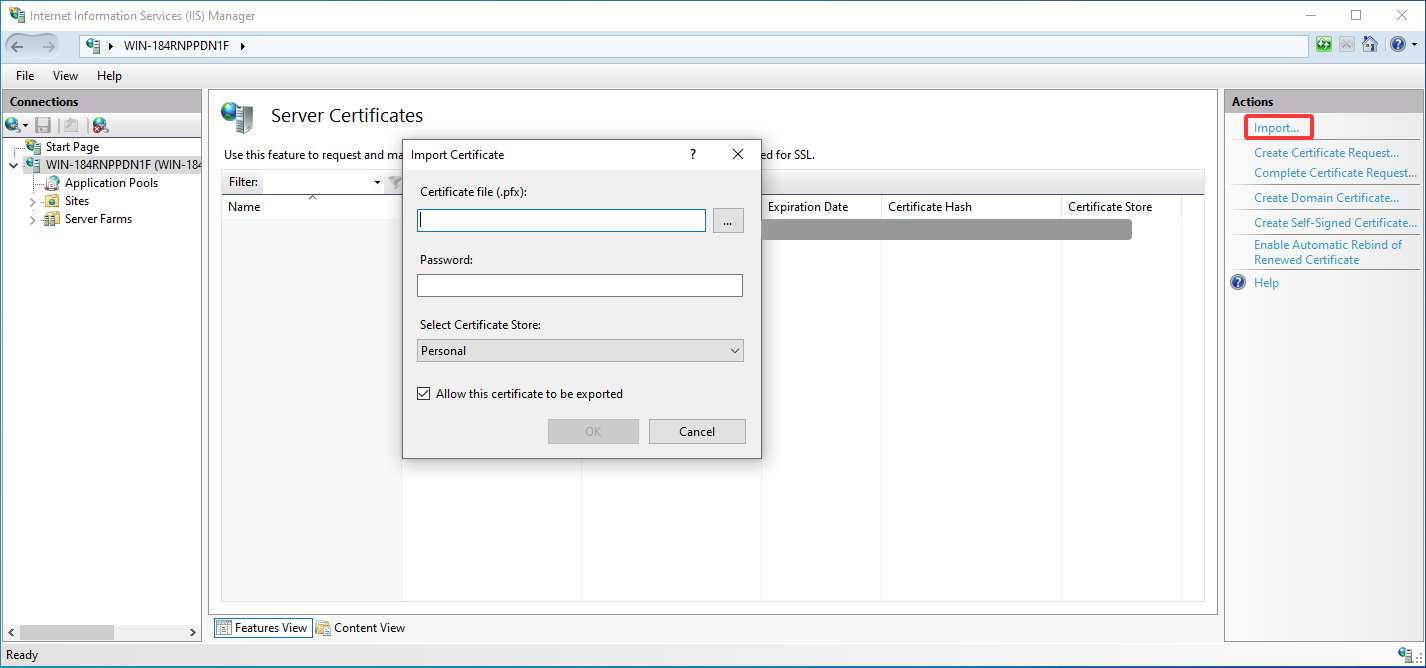
- Select the file and enter the password according to the certificate provider's instructions. If the certificate is converted via OpenSSL, there is no password.
- Click
OKto complete
Configure site(s)
TIP
Please configure 2 sites if for both Web and Daemon
Add a website, create and select an empty directory. Then configure an HTTPS binding for the corresponding port and host name. When binding, check Require Server Name Indication if you use domain and necessary.
Please open the port in the firewall settings. To ensure system security, disabling the firewall is not recommended!
Configure reverse proxy & variables
Local Machine
- Navigate to the IIS local machine configuration and go to
Application Request Routing Cache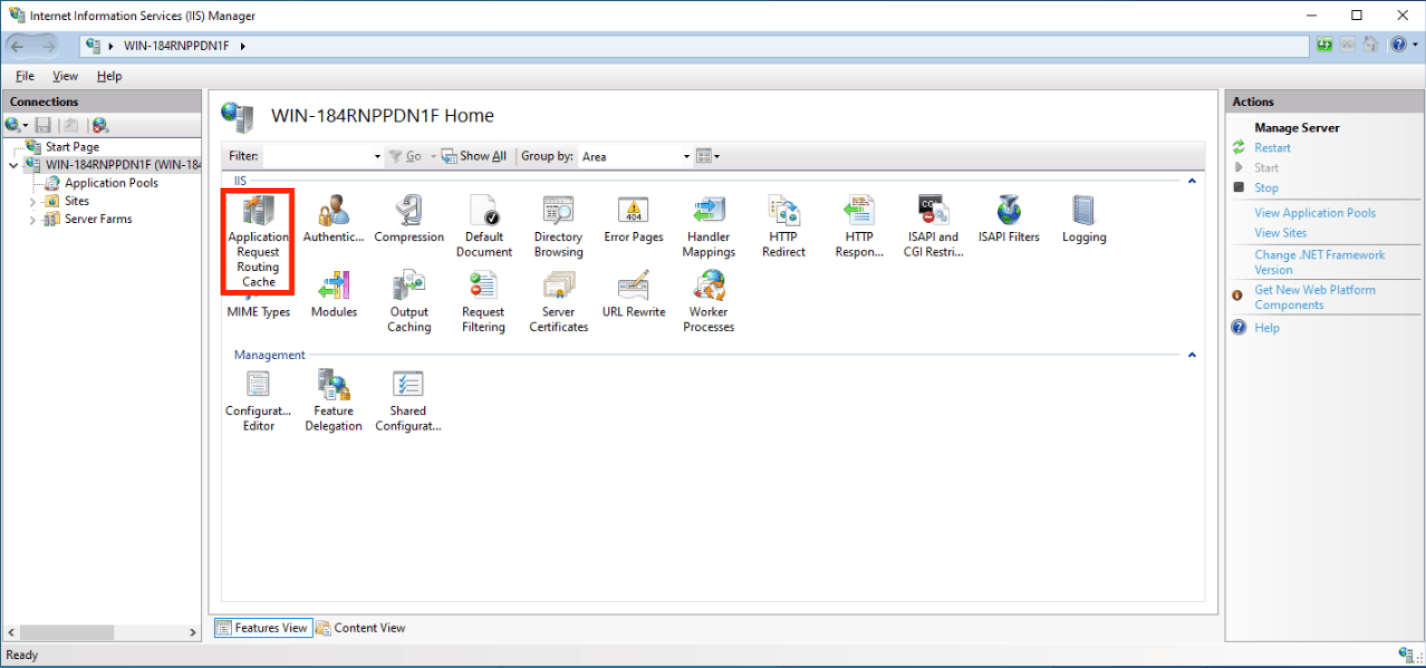
- Click
Server Proxy Settingsin the right column - Check
Enable Proxyand clickApplyin the right column
Site(s)
TIP
Please use different directories as IIS saves config to web.config.
- Go to
URL Rewriteof the site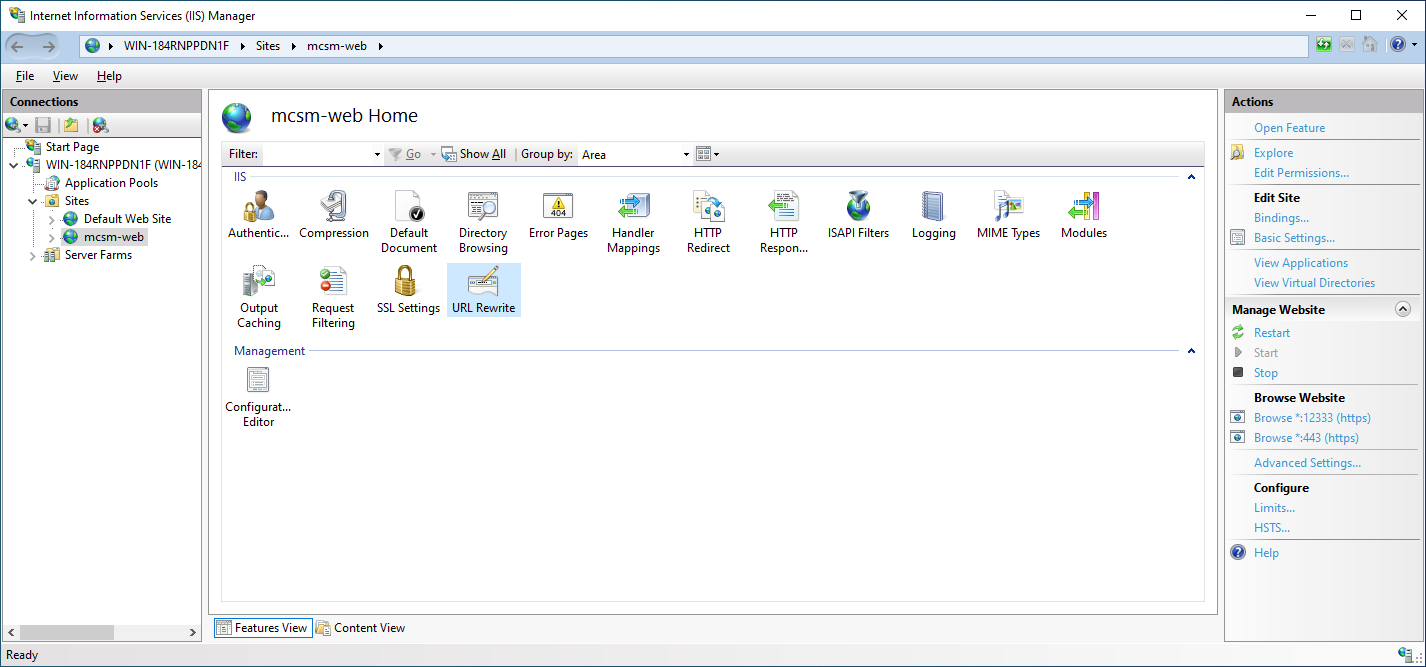
- Add the following variables to allow list
- HTTP_HOST
- HTTP_REMOTE_HOST
- HTTP_X_FORWARDED_FOR
- HTTP_X_REAL_IP
- Click
Back to Rules - Add a blank inbound rule
- Name the rule as you like
- Set pattern to
^(.*), and make sure the above option isMatches the Pattern/Regular ExpressionsandIgnore casechecked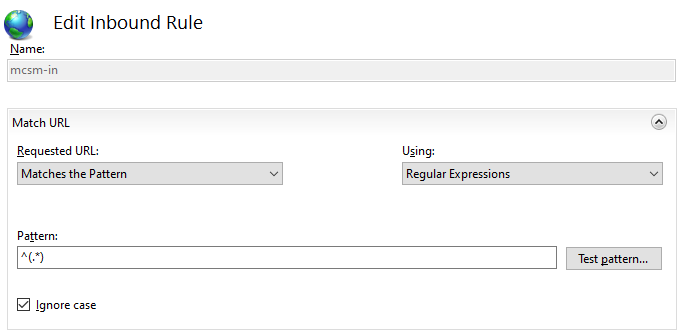
- 按照如下表格设置服务器变量
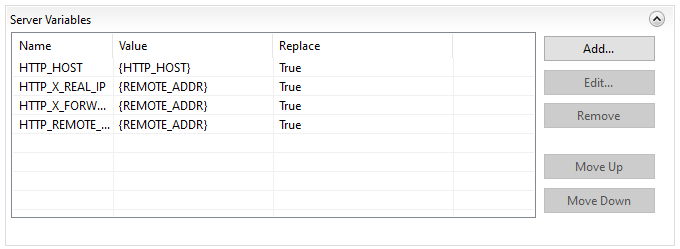 If you are using Cloudflare proxy, set
 HTTP_X_REAL_IPto{HTTP_CF_Connecting_IP}.
| Name | Value | Replace |
|---|---|---|
| HTTP_HOST | {HTTP_HOST} | True |
| HTTP_X_REAL_IP | {REMOTE_ADDR} | True |
| HTTP_X_FORWARDED_FOR | {REMOTE_ADDR} | True |
| HTTP_REMOTE_HOST | {REMOTE_ADDR} | True |
Configure Action
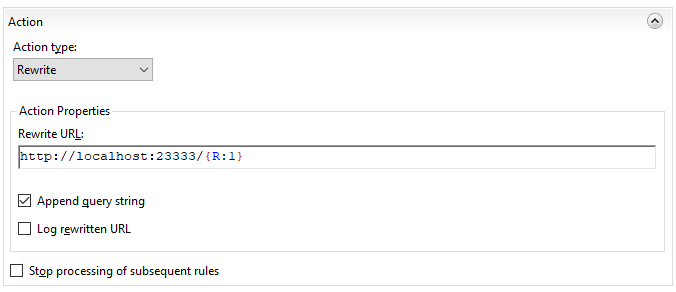
- Action type:
Rewrite - Rewrite URL:
http://address:port/{R:1} - Check
Append query string - Uncheck
Log rewritten URL - Uncheck
Stop processing of subsequent rules
- Action type:
Click
Applyon the right panel
Verify Configuration
Once the configuration is ready, you can test the configuration by accessing the dashboard and/or nodes through the reverse proxy.
Suppose the domain being used is domain.com , and the HTTPS port is 12333 (for daemon) and 12444 (for panel), we can then access the following URL using any browser:
Panel: https://domain.com:12333/
Daemon: https://domain.com:12444/
For the daemon, if the following content is displayed, the HTTPS reverse proxy is successfully configured!
[MCSManager Daemon] Status: OK | reference: https://mcsmanager.com/
For the web, if the login page is displayed correctly, the HTTPS reverse proxy is successfully configured!
Connect via HTTPS
At this point, if you acess the web panel, you'll find that you can log in without problem.
However
If you enter any instance console to upload or download files, etc., you will find that it still doesn't work properly. This is because MCSManager requires the browser to connect directly to remote daemon. Since you've upgraded to HTTPS, the browser refuses to use the Websocket+HTTP protocol to connect to remote daemon!
Why does the browser need to connect directly to the remote daemons?
Go to the Daemons tab, you might find connections to remote daemons using localhost, 123.x.x.x, or other domains. A reverse proxy for each remote daemon must be configured separately, so that they all use HTTPS to connect.
Once configured, replace the original localhost, 123.x.x.x, or domain.com with wss://localhost, wss://123.x.x.x, or wss://domain.com respectively.